What Are the Best Volcano Tours for Photographers?
As a photographer, you understand the allure of capturing the raw and untamed power of nature. The question is, where can you find the best opportunities to capture the awe-inspiring beauty of volcanic landscapes?
Whether you're an amateur photographer looking to expand your portfolio or a seasoned professional seeking new challenges, the world offers a myriad of volcano tours tailored to meet your photography needs. From the smoldering craters of active volcanoes to the ethereal glow of lava flows under the starry night sky, each destination presents unique opportunities to capture stunning images that will leave a lasting impression.
And while the prospect of embarking on a volcano tour may seem daunting, the promise of honing your photography skills in some of the most breathtaking and dramatic settings on Earth is undeniably alluring.
Volcano Photography Essentials
To capture stunning volcano photographs, bring a sturdy tripod to steady your camera and ensure sharp images. When it comes to lighting techniques and exposure settings, consider shooting during the golden hours of sunrise and sunset for warm, soft light that enhances the texture and colors of the volcanic landscape. Adjust your exposure settings to balance the brightness of the lava and the surrounding environment, ensuring that no details are lost in the highlights or shadows.
When finding unique perspectives, look for foreground elements like rocks, trees, or people to add depth and scale to your images. Experiment with different angles and compositions to tell a compelling story through your photographs. Consider capturing the interaction between people and the volcanic environment, showcasing the awe and wonder that these natural wonders inspire.
As you explore the volcano, pay attention to the small details that can add depth and meaning to your images. Whether it's the texture of the hardened lava, the contrast between the rugged terrain and the sky, or the subtle changes in color as the sun sets, these details can help tell a powerful story through your photography.
Must-Have Camera Gear
Ensure you have the right camera gear to capture stunning volcano photographs.
When photographing volcanoes, having the right camera lens is crucial. A wide-angle lens, such as a 16-35mm, allows you to capture the expansive landscape and dramatic skies often associated with volcanic activity. It also enables you to include foreground elements, adding depth to your compositions. Additionally, a telephoto lens, like a 70-200mm, can help you capture close-up shots of the volcanic features, such as vents, lava flows, and exploding ash clouds, while maintaining a safe distance.
Tripod stability is essential for capturing sharp and well-exposed images, especially in low light conditions that are common around volcanic areas. A sturdy tripod will keep your camera steady during long exposures, allowing you to capture the mesmerizing glow of lava flows or the beauty of a star-filled sky above an active volcano. Look for a tripod that's both lightweight and durable, as you may need to hike to remote locations to capture the best shots.
In addition to the camera lens and tripod stability, consider investing in filters to protect your equipment from ash and debris, a remote shutter release for capturing long exposures without camera shake, and extra batteries and memory cards for extended shooting sessions.
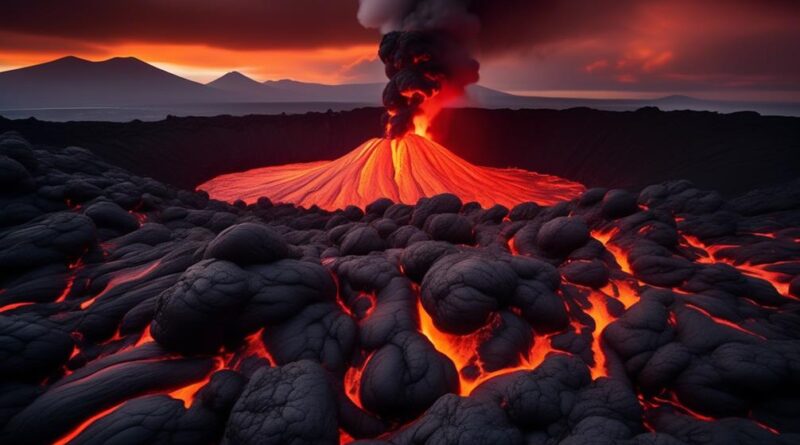
Capturing Lava Flows
When capturing lava flows during your volcano tour, your wide-angle lens will allow you to encompass the raw power and mesmerizing beauty of the volcanic activity. As you embark on volcano hiking to photograph these incredible thermal features, it's essential to prioritize safety while maximizing your photographic opportunities. Lava flows can be unpredictable, so it's crucial to stay within designated safe zones and heed the guidance of experienced tour guides.
To capture the dynamic nature of lava as it flows and solidifies, consider using a tripod to steady your shots. This will allow you to experiment with longer exposure times, creating stunning images that convey the fluidity and intensity of the molten rock. Additionally, utilizing a polarizing filter can help reduce glare and enhance the colors of the lava, resulting in more vibrant and striking photographs.
When photographing lava flows, it's important to pay attention to the surrounding landscape. Incorporating elements such as rugged terrain or the juxtaposition of the glowing lava against the night sky can add depth and context to your images. Don't be afraid to experiment with different angles and perspectives to truly capture the awe-inspiring nature of volcanic activity.
Remember to pack essential safety gear, such as heat-resistant gloves and sturdy hiking boots, to ensure your comfort and protection while navigating the rugged terrain. By combining technical skill with a creative eye, you can capture breathtaking photographs of lava flows that showcase the raw power and beauty of these natural phenomena.
Sunrise and Sunset Shots
As a photographer on a volcano tour, capturing the breathtaking sunrise and sunset shots requires careful planning and creative vision. The golden hour, just before sunrise and after sunset, provides the perfect lighting for stunning photographs. Silhouette photography during these times can create dramatic and captivating images.
Here are a few tips to help you make the most of these magical moments:
- Scout Locations: Before the golden hour, scout out potential locations to photograph the sunrise or sunset. Look for interesting foreground elements such as trees, rock formations, or other natural features to add depth to your shots.
- Use a Tripod: Stability is key when shooting during low light conditions. A sturdy tripod will help you capture sharp, clear images, especially if you plan to use longer exposure times.
- Experiment with Composition: Don't be afraid to experiment with composition during the golden hour. Play with framing and angles to create unique and captivating shots.
- Utilize Silhouettes: Use the natural light during sunrise and sunset to create striking silhouettes. Position your subjects in front of the bright sky to capture their outline against the colorful backdrop.
- Stay Patient: The light and colors during the golden hour can change rapidly. Be patient and stay ready to capture the perfect moment as the lighting evolves.
Composition and Framing Tips
To enhance your sunrise and sunset shots, consider applying effective composition and framing techniques to create compelling and visually engaging photographs during the golden hour. Lighting techniques play a crucial role during this time of day. Utilize the warm, soft light to your advantage by adjusting your exposure settings. Experiment with different exposures to capture the rich colors and dramatic contrasts of the volcanic landscapes. Use a lower ISO to avoid noise and maintain image quality, and consider bracketing your shots to ensure you capture the full dynamic range of the scene.
In addition to mastering lighting and exposure, capturing unique perspectives and creative angles can add depth and interest to your volcano tour photos. Try shooting from a low vantage point to emphasize the scale and grandeur of the volcanoes, or consider framing your shots with natural elements such as trees or rock formations to create a sense of depth and context. Incorporating leading lines, such as the curves of a lava flow or the silhouette of a mountain ridge, can also guide the viewer's eye through the image and add a dynamic quality to your photographs.
Remember to keep experimenting with different composition and framing techniques to find the most visually striking and compelling shots. By combining effective lighting techniques with creative perspectives and angles, you can capture the awe-inspiring beauty of volcanoes in a way that truly resonates with your audience.
Night Sky Photography
Capture breathtaking images of the starry night sky during your volcano tour by mastering the art of night sky photography. Here are some tips to help you achieve stunning astrophotography during your adventure:
- Use a Sturdy Tripod: To capture clear and sharp images of the night sky, a sturdy tripod is essential. It will help stabilize your camera and prevent blurriness in your photos.
- Set a Wide Aperture: When shooting the night sky, use a wide aperture (low f-stop number) to allow more light into your camera. This will help capture the faint light of stars and galaxies.
- Long Exposure Times: Experiment with long exposure times to capture star trails. This technique involves leaving the camera's shutter open for an extended period, allowing the stars' movement to create mesmerizing trails in the night sky.
- Manual Focus: Switch your camera to manual focus mode and adjust it to infinity to ensure the stars are in sharp focus. Autofocus can struggle in low-light conditions, so manual focus is crucial for astrophotography.
- Consider the Moon Phase: Be mindful of the moon phase during your volcano tour. A full moon can wash out the stars, while a new moon offers the darkest skies for capturing the brilliance of the stars.
Drone Photography Opportunities
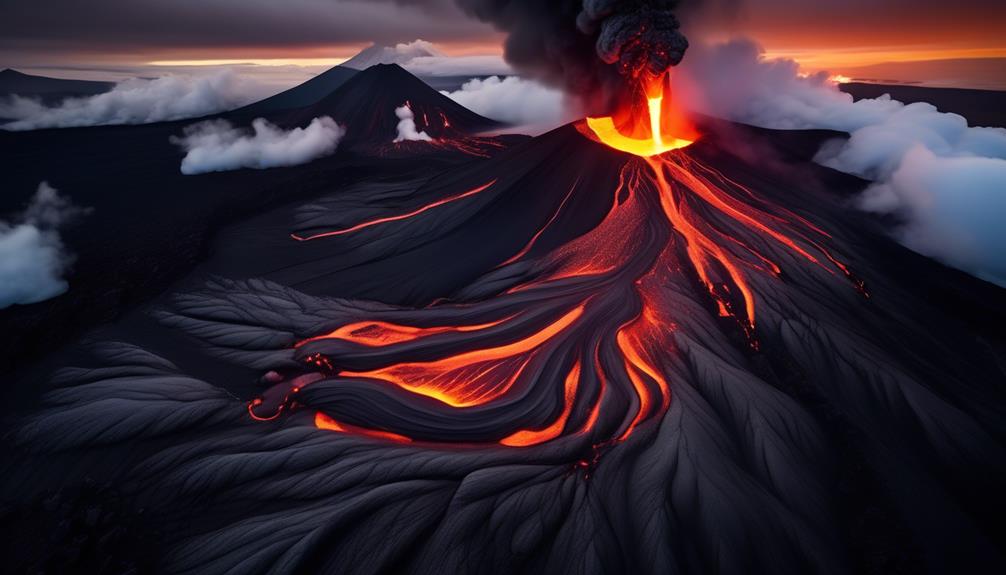
Mastering the art of night sky photography during your volcano tour will prepare you to take advantage of the exciting drone photography opportunities available as well. With drones, you can capture stunning aerial perspectives of volcanic landscapes that are otherwise inaccessible. Drones offer unique angles, allowing you to showcase the sheer magnitude and beauty of volcanic formations from above. The ability to maneuver a drone provides unparalleled access to capture cinematic footage, offering dynamic and engaging visuals of the volcanic terrain. From the billowing smoke to the molten lava flows, drones can capture the raw power of a volcano in ways that ground photography simply cannot.
Moreover, drones enable you to capture panoramic views, providing a sense of scale and grandeur that traditional photography might struggle to convey. You can showcase the vastness of volcanic craters, the intricate patterns of lava fields, and the juxtaposition of the volcanic landscape with its surroundings. These panoramic views add depth and context to your photography, immersing viewers in the awe-inspiring volcanic environment.
With the right skills and equipment, drone photography opens up a world of possibilities for capturing the dramatic beauty of volcanoes. It allows you to create visuals that aren't only captivating but also offer a fresh and breathtaking perspective on these natural wonders.
Editing and Post-Processing Techniques
Enhance your volcanic landscape photography by learning essential editing and post-processing techniques. After capturing stunning images during your volcano tour, the next step is to perfect and enhance them through editing. Here are some key techniques to consider:
- Color Correction: Adjust the colors of your volcanic landscape photographs to accurately represent the natural hues of the environment. Use tools like white balance, saturation, and vibrance to make the colors pop and create a captivating visual impact.
- Long Exposure: Utilize long exposure techniques to capture the mesmerizing movement of lava flows, volcanic eruptions, or glowing hotspots. Long exposure shots can convey the dynamic and powerful nature of volcanic landscapes, creating dramatic and captivating imagery.
- Contrast and Clarity: Enhance the details and textures in your volcanic landscape photographs by adjusting contrast and clarity. Bring out the ruggedness of the terrain and the intricacies of the volcanic features to create compelling and dynamic imagery.
- Noise Reduction: When shooting in low light conditions or using high ISO settings, noise can detract from the quality of your images. Employ noise reduction techniques to ensure that your volcanic landscape photographs are clear, sharp, and free from distracting digital noise.
- Sharpening and Detail Enhancement: Fine-tune the sharpness and details in your volcanic landscape images to ensure they're crisp and visually engaging. Use selective sharpening to draw attention to specific elements within the scene and create impactful compositions.
Frequently Asked Questions
Are There Any Specific Safety Precautions or Guidelines That Photographers Should Be Aware of When Capturing Volcano Photography?
When capturing volcano photography, safety precautions are crucial. Always check for local guidelines and be aware of potential hazards such as toxic gases and unstable terrain. Recommended gear includes a sturdy tripod and protective equipment for yourself and your camera.
Practice photography etiquette by respecting the environment and local community. Minimize your environmental impact by staying on designated paths and not disturbing wildlife. Remember to prioritize safety and respect while capturing stunning volcano images.
How Can Photographers Best Capture the Dynamic and Unpredictable Nature of Volcanic Eruptions in Their Photos?
To capture movement during volcanic eruptions, use a slow shutter speed to create a sense of dynamism. Incorporate dramatic lighting techniques, such as backlighting or side lighting, to enhance the drama and intensity of the scene. Experiment with different angles to convey the scale and power of the eruption.
Be cautious of safety, and always follow local guidelines and advisories. Remember to prioritize your safety while capturing these incredible moments.
Are There Any Recommended Locations or Tours That Offer Unique Access to More Remote or Less-Visited Volcanoes for Photography?
For remote locations and unique access, consider exploring lesser-known volcanoes. To capture stunning shots, pack essential photography equipment and follow best practices.
Look for tours that offer specialized access to these hidden gems, providing an opportunity to photograph rarely seen volcanic landscapes. Such tours can provide a unique perspective and help you create captivating images that stand out from the typical tourist spots.
What Are Some Tips for Photographing Volcanic Landscapes in Different Weather Conditions, Such as Fog or Rain?
When photographing volcanic landscapes in different weather conditions, like fog or rain, you'll face lighting challenges. Adjust your composition to capture the atmospheric mood.
Bring weather-sealed equipment and a sturdy tripod. Be ready to adjust settings quickly.
In post-processing, enhance contrast and color to bring out details.
Are There Any Ethical Considerations or Guidelines for Photographers When Capturing Images of Active Volcanic Sites?
When photographing active volcanic sites, ethical considerations are crucial. Always prioritize safety precautions, respecting warning signs and guidelines. Avoid disrupting the natural environment or endangering yourself and others. Be mindful of the impact of your presence on the area.
Additionally, seek permission when necessary and respect the local culture and customs. It's important to capture stunning images while being mindful of the ethical implications and safety measures involved.
Conclusion
So, whether you're an amateur or professional photographer, there are plenty of volcano tours that offer incredible opportunities for capturing stunning images.
With the right gear and techniques, you can capture the raw power and beauty of volcanic landscapes, lava flows, and the night sky.
From sunrise to sunset, and even after dark, there are endless possibilities for creating breathtaking photos that will impress any viewer.
Don't miss out on these unique photography experiences!