5 Best DIY Car Repair Guides for Road Trips
If the thought of car troubles on a road trip makes you hesitant to venture far from home, fret not. You don't need to be a professional mechanic to handle common car issues that may arise during your travels.
Imagine having the confidence to tackle unexpected breakdowns confidently and swiftly, getting you back on the road in no time.
Discover the top five DIY car repair guides that will equip you with the knowledge and skills to handle various car problems independently, ensuring a smoother journey ahead.
Essential Tools for DIY Car Repair
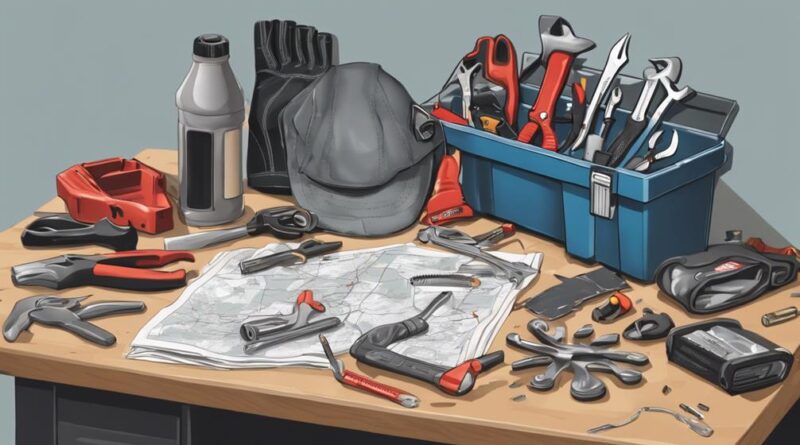
When embarking on DIY car repair, having the essential tools at your disposal is crucial for a successful road trip. Tool organization plays a vital role in ensuring efficiency and safety during your repairs. A well-organized toolbox not only saves time but also prevents accidents by reducing clutter and the chances of misplacing tools. Prioritize safety precautions by wearing appropriate protective gear such as gloves and goggles to shield yourself from potential hazards like sharp edges or flying debris.
Before starting any repair work, familiarize yourself with the tools you'll need. A basic set typically includes a jack, lug wrench, socket set, screwdrivers, pliers, and a flashlight. Keep these tools organized in a sturdy toolbox or tool bag that's easy to transport and access when needed. Additionally, consider investing in a portable jump starter and tire pressure gauge for emergencies on the road.
When handling tools, always follow safety guidelines to prevent injuries. Inspect your tools regularly for any signs of wear or damage, and replace them as needed. Properly store tools after use to maintain their condition and prevent accidents. Remember to work in a well-lit and ventilated area to enhance visibility and reduce exposure to fumes from your vehicle.
Basic Car Maintenance Checklist
To keep your vehicle running smoothly, regularly checking and maintaining essential components is key. Two crucial aspects of basic car maintenance are the oil change and brake inspection.
Firstly, ensuring regular oil changes is vital for the health of your engine. Engine oil lubricates the moving parts, reduces friction, and helps cool the engine. Over time, oil breaks down and becomes less effective, potentially leading to engine damage. Check your vehicle's manual for the recommended oil change intervals, usually every 5,000 to 7,500 miles, but this can vary depending on the car and the type of oil used. You can either change the oil yourself following a DIY guide or take your car to a mechanic for this routine maintenance task.
Secondly, brake inspection is crucial for your safety on the road. Brakes should be inspected regularly to ensure they're functioning correctly. Signs that your brakes may need attention include squeaking or grinding noises, vibrations while braking, or the vehicle pulling to one side. If you notice any of these signs, it's essential to have your brakes inspected by a professional to prevent potential accidents. Regular brake maintenance can help avoid costly repairs down the road and keep you safe during your road trips.
Troubleshooting Common Road Trip Issues
Regularly maintaining your vehicle can help prevent and address common road trip issues, ensuring a smoother journey. When hitting the road, being prepared for potential mishaps is key. Here are some essential tips to troubleshoot common road trip issues:
- Car Breakdown Prevention: Before embarking on your journey, make sure to check essential components like the tires, brakes, fluids, and lights. Keep an eye out for warning signs such as strange noises, leaks, or dashboard warning lights. Addressing these preemptively can prevent breakdowns on the road.
- Roadside Assistance Alternatives: In case of an emergency, having roadside assistance coverage can be a lifesaver. However, if you find yourself in a situation where help isn't immediately available, knowing some basic emergency repair solutions can get you back on track. Carry essential tools like a jack, lug wrench, jumper cables, and a flashlight to tackle minor issues.
- Common Road Trip Mishaps: Flat tires, dead batteries, overheating engines, and empty gas tanks are among the most common issues faced during road trips. Familiarize yourself with how to address these problems quickly and efficiently to minimize downtime and get back to enjoying your journey.
Step-by-Step Tire Changing Guide
Prepare to confidently tackle a flat tire on your road trip with this step-by-step tire changing guide. When you find yourself with a flat tire, the first step is to safely pull over to a flat, stable surface. Turn on your hazard lights, apply the parking brake, and grab your spare tire, lug wrench, and jack from the trunk.
Next, loosen the lug nuts on the flat tire slightly, but don't remove them completely yet. Place the jack under the car in the specified lifting point near the flat tire, and raise the vehicle until the flat tire is off the ground. Remove the lug nuts, take off the flat tire, and mount the spare tire onto the hub.
Carefully tighten the lug nuts by hand, lower the car back to the ground with the jack, and then fully tighten the lug nuts using a crisscross pattern. It's crucial to ensure they're secure. Afterward, stow away your flat tire, jack, and tools.
Remember to check the spare tire's pressure and, if needed, use quick inflation methods to reach the recommended PSI. Finally, drive cautiously to the nearest service station to have your flat tire repaired or replaced.
Fluids Check and Refill Procedures
Ensure your vehicle's optimal performance by regularly checking and properly refilling essential fluids to prevent potential breakdowns during your road trip. Here are three crucial fluid check and refill procedures you should follow:
- Brake Fluid:
- Start by locating the brake fluid reservoir under the hood.
- Ensure the brake fluid level is between the 'min' and 'max' markings on the reservoir.
- If it's below the 'min' mark, add the appropriate brake fluid recommended in your vehicle's manual.
- Be cautious as brake fluid is corrosive; avoid spilling it on your car's paint.
- Coolant Level:
- Check the coolant level when the engine is cool.
- Locate the coolant reservoir and ensure the fluid is between the minimum and maximum levels.
- If needed, top it up with a mixture of coolant and water as recommended by the manufacturer.
- Remember never to open the radiator cap when the engine is hot to prevent burns.
- Engine Oil:
- Regularly check the engine oil using the dipstick.
- Park on a level surface, pull out the dipstick, wipe it clean, reinsert it fully, and then pull it out again to check the oil level.
- If it's low, add the appropriate grade of oil.
- Make sure not to overfill.
Emergency Car Battery Replacement
When faced with an emergency car battery replacement, swiftly assess the situation and take necessary steps to safely replace the battery. Start by ensuring the vehicle is turned off, and the emergency brake is engaged. To begin the replacement process, put on safety gloves and goggles to protect yourself from any potential acid exposure. Before disconnecting the old battery, make sure to clean the battery terminals using a mixture of baking soda and water to prevent any corrosion issues.
Once the terminals are clean, carefully loosen the nut or bolt securing the negative (black) cable first, followed by the positive (red) cable. Remember, it's crucial not to touch both terminals at the same time to avoid any electrical hazards. After removing the cables, unbolt the battery hold-down bracket and carefully lift out the old battery.
Before installing the new battery, double-check that it matches the specifications of the old one to prevent any compatibility issues. Place the new battery in the tray, secure it with the hold-down bracket, and reconnect the positive cable first followed by the negative cable. Finally, give the terminals a light coating of petroleum jelly to prevent future corrosion. By following these steps and adhering to battery safety precautions, you can efficiently replace your car battery in an emergency situation.
Quick Fixes for Engine Overheating

To prevent engine overheating during your road trip, regularly check your coolant levels and inspect for any leaks or blockages. If you encounter issues on the road, here are some quick fixes to help you address engine overheating:
- Check Coolant Levels: Ensure that your coolant levels are within the recommended range. If low, top it up with a mixture of coolant and water. This helps maintain the proper temperature in your engine.
- Inspect for Coolant Leaks: Look for any signs of coolant leaks under your car. Common areas of leaks include hoses, the radiator, or the water pump. If you spot a leak, try tightening the connection if it's a loose hose or use a coolant stop-leak product temporarily.
- Radiator Flush: If you suspect a clog in your radiator, a flush can help remove debris and build-up that may be causing the overheating. Follow the manufacturer's instructions or seek professional help if needed.
Pre-Trip Inspection Tips for Safety
Perform a thorough inspection of your vehicle before embarking on a road trip to ensure safety and prevent potential issues. Start by checking the brake system. Inspect the brake pads for wear and tear, ensuring they're in good condition and have sufficient thickness. Look at the brake lines for any signs of leaks or damage. Test the brake pedal responsiveness and listen for any unusual noises when braking. Proper functioning brakes are crucial for your safety on the road.
Next, examine the electrical systems. Check the headlights, taillights, turn signals, and brake lights to ensure they're working correctly. Test the battery to make sure it's holding a charge and the terminals are clean and free of corrosion. Inspect the alternator and starter for any signs of malfunction. It's essential to have functioning lights and a reliable electrical system for visibility and overall vehicle operation.
In addition to these checks, inspect the windshield wipers, fluid levels, tires, and suspension components. Make sure all fluids are topped up, the tires are properly inflated, and there are no visible signs of damage. Taking the time to perform these pre-trip inspections can help prevent breakdowns and ensure a safe and smooth journey.
Frequently Asked Questions
How Often Should I Check and Replace My Car's Air Filter During a Road Trip?
When you're on a road trip, it's crucial to check and replace your car's air filter regularly. Neglecting this maintenance can lead to reduced engine performance and fuel efficiency.
To ensure optimal air flow, inspect your air filter every 12,000 to 15,000 miles. DIY replacement is simple: locate the air filter housing, remove the old filter, and install the new one following the manufacturer's instructions.
This quick task can help your engine run smoothly during your travels.
Are There Any Specific Precautions I Should Take When Changing a Flat Tire on a Busy Highway?
When changing a flat tire on a busy highway, safety should be your top priority.
Always pull over to a safe spot away from traffic. Use your emergency kit to set up warning triangles or flares. Stay alert and aware of passing vehicles. If you're uncomfortable, consider roadside assistance for added safety.
What Are Some Signs That Indicate My Car May Have a Faulty Alternator While on a Road Trip?
If your car's lights are dimming, dashboard warning lights are flickering, or you notice unusual noises or a burning smell, you might've alternator issues.
To troubleshoot, check the battery by testing its voltage, inspect the alternator belt for wear, and ensure all connections are secure.
Prevent alternator failure by avoiding overloading electrical systems and having your vehicle regularly serviced to catch any issues early.
Can I Use Any Type of Motor Oil for Topping off My Engine Oil During a Road Trip, or Is There a Specific Type I Should Use?
You should be cautious when topping off engine oil during a road trip. Not all motor oils are compatible with your vehicle. It's crucial to check your car's manual for the recommended oil viscosity.
Synthetic oils offer better performance but can be pricier. While conventional oils are more budget-friendly, they may not provide the same level of protection.
Always use the right type of oil to keep your engine running smoothly.
How Do I Safely Jumpstart My Car Battery if I Am Alone on a Road Trip With No Other Vehicles Around?
If you're alone on a road trip with a dead battery, grab your emergency kit. Essential items like jumper cables and gloves are key.
Prioritize battery safety by ensuring the vehicles are off and in park. Connect the cables correctly, red to the positive terminals and black to a metal ground.
Start the working car, then yours. Once running, drive for at least 15 minutes to recharge. Remember these precautions for a smooth jumpstart!
Conclusion
So there you have it – with the right tools, knowledge, and these DIY car repair guides, you'll be well-equipped to handle any road trip issues that come your way.
Remember to always prioritize safety and follow proper procedures when working on your vehicle.
With a little preparation and some handy tips, you can hit the road with confidence knowing you have the skills to handle any car troubles that may arise.
Happy travels!